Scrapbooking

Showing posts with label scrapbooking. Show all posts

Wednesday, July 27, 2011

Birthday card

It's my friend's Birthday so I made her this little card..
 simple enough for a beginner to tackle. 


This 2 sided paper is from Gartner Studios, Bon Voyage - World Map


This paper flower is made with stacked scallop circles all 1.5 inches, sprayed wet and scrunched, un-scrunched and then attached together by a center brad. Once you have the brad in, you can fluff it up as you like and let it dry completely before adding to your layout or card.

Sweet!


Friday, July 22, 2011

Princess Coaster Mini Album

Another girly album is completed, this one geared towards the Little Princess fans. I have a fondness for Disney and just love to work on Disney albums. I think I'll have to make one of these little coaster albums with a Disney boy theme, but at the moment I've started a Mickey altered journal/scrap/activity book that needs finishing too.

So many papers, so little time. :)

Again, I wanted to play with some charms I started making.. and I have been making most of my own embellishments these days as well. I had features on my Cricut that were not being used enough.. especially those end caps. Now I'm hooked on them and have been using them for page titles. 


I (finally) bought a Sizzix Big Shot for embossing paper.. this one was Tim Holtz "Alterations" 
folder, Dot-Matrix

Cricut end caps in use for titles!

Cute little Cricut flowers and an "end cap" tag..


"Who's the fairest of them all?" mirror charm.

Now that I have the charm thing down I'd love to make some pins, but I'm not shopping this month... guess I can wait till August to try that! 

One more charm...  I love that I can take some beads and tools and make these anywhere.
Even on vacation!


Sweet!

This album was added to the Inspire Me Fridays linky party at Joyful Stamper
and Clean and Scentsible Creative Spark link party.


Sunday, July 10, 2011

Girlz! An itty bitty Coaster album.

So, I have all this girly paper and no girls in my house.

I decided to go ahead and use it up and get a start on some product for an Etsy store that I keep thinking I will start some day.. I always have good intentions and then I get side tracked.

I started with some papers that I thought would appeal to the tween group and tried to make it something that would appeal to the 10 - 13 year old set. I think I got it..

Now that is has a ribbon and a charm, I'll stop messing with it.

Lots of tags!


Of course, if your like me, it's never finished and I decided I should have charms on my albums, so I whipped up one of those too.. I had no idea I could do this but once I started I went crazy. I love how they all turned out.

New ideas to take me away from the laundry!


I won't bore you with all of them.. but they are fun to do! Since this photo, I've made a few more with pink, I'll add the pics on the next blog. Princess mini coaster album coming up..
and.. another cool cake! Yum. 

Album added to Inspire Me Fridays with Joyful Stamper
and Linkin' with Lil' Luna every Wednesday

Sunday, May 8, 2011

Happy Mother's Day!!

Yay! I finally get a morning to myself.. of course it's only a couple of hours than I have to start working on some specialty theatre props for a local dinner theatre I occasionally work for.

I wanted to share the Mother's Day card I made for my Mother-in-law. She is a lovely, beautiful, Italian Woman who is a joy to sit and chat with. She loves her time in the garden and always has perfectly manicured flowers and veggies. So, I wanted to reflect that.

The torn piece of Polka Dot paper is by K&Company.. the ruffled flower is two sided paper (Ducks in a Row: Pat a Cake) by October Afternoon. I had a piece of wired ribbon in a scrap heap and bunched it up.  Lot's of edge inking going on..


 The butterflies were punched, glittered and layered.


I cut the tag on my Cricut using Fabulous Finds and popped it up on a couple of foam dots.

I decided at the last minute (ok, 20 minutes ago) I wanted a small flower on the inside and didn't want to turn on the Cricut.
So, I was going through my punches when a light bulb went on!
My small Hidden Mickey was to be reborn as a flower. I punched out 4 and overlapped them into this cute little flower. 


Magnifico!


Happy Mother's Day to all the Moms in the world!

I'm submitting this design to the Make it Monday linky party, drop over and join the fun!

Tuesday, April 19, 2011

That's a Wrap!

I had to wrap a Boxed CD set for my Husband's Birthday last year and wouldn't you know I'm unable to just do it like a normal person.

Instead I altered a cigar box to do the job.

Click on images to see larger sizes
We have a room for his guitars, a garage for his fishing gear and we like to play scrabble. So, keeping all that in mind I started by photocopying a Scrabble board and reducing the size till it fit my little Scrabble tiles. After printing the image I dunked it in very strong tea, and then used a blow dryer on it. I have to say this is my favorite distressing technique and I use it often. The recipe was found online and already distressed, I only brushed on a light spot or two of tea.

The pole is a twig and I added a real fishing fly to the string (with the hook cut off).. but I see it's missing.

For my manly projects I like to use black nylon screening and natural papers such as Mulberries and plain old brown paper bags. The screening can be cut to size unevenly and then if you pull the threads off a few at a time you get that eyelash effect along the edge.


On the inside there is more of the same idea.. I also added a little
brown bag that holds a tag. On the flip side of the tag is a description of a fishing trip I planned for us at a cozy lakeside cottage.

I wrapped the CD set in plain Kraft paper (not shown) and I made the tiny tag on twine to add to it.. I lined the inside of the box with torn pieces of paper bag instead of the usual tissue. Recycle! It made a nice cushioning for the CDs.


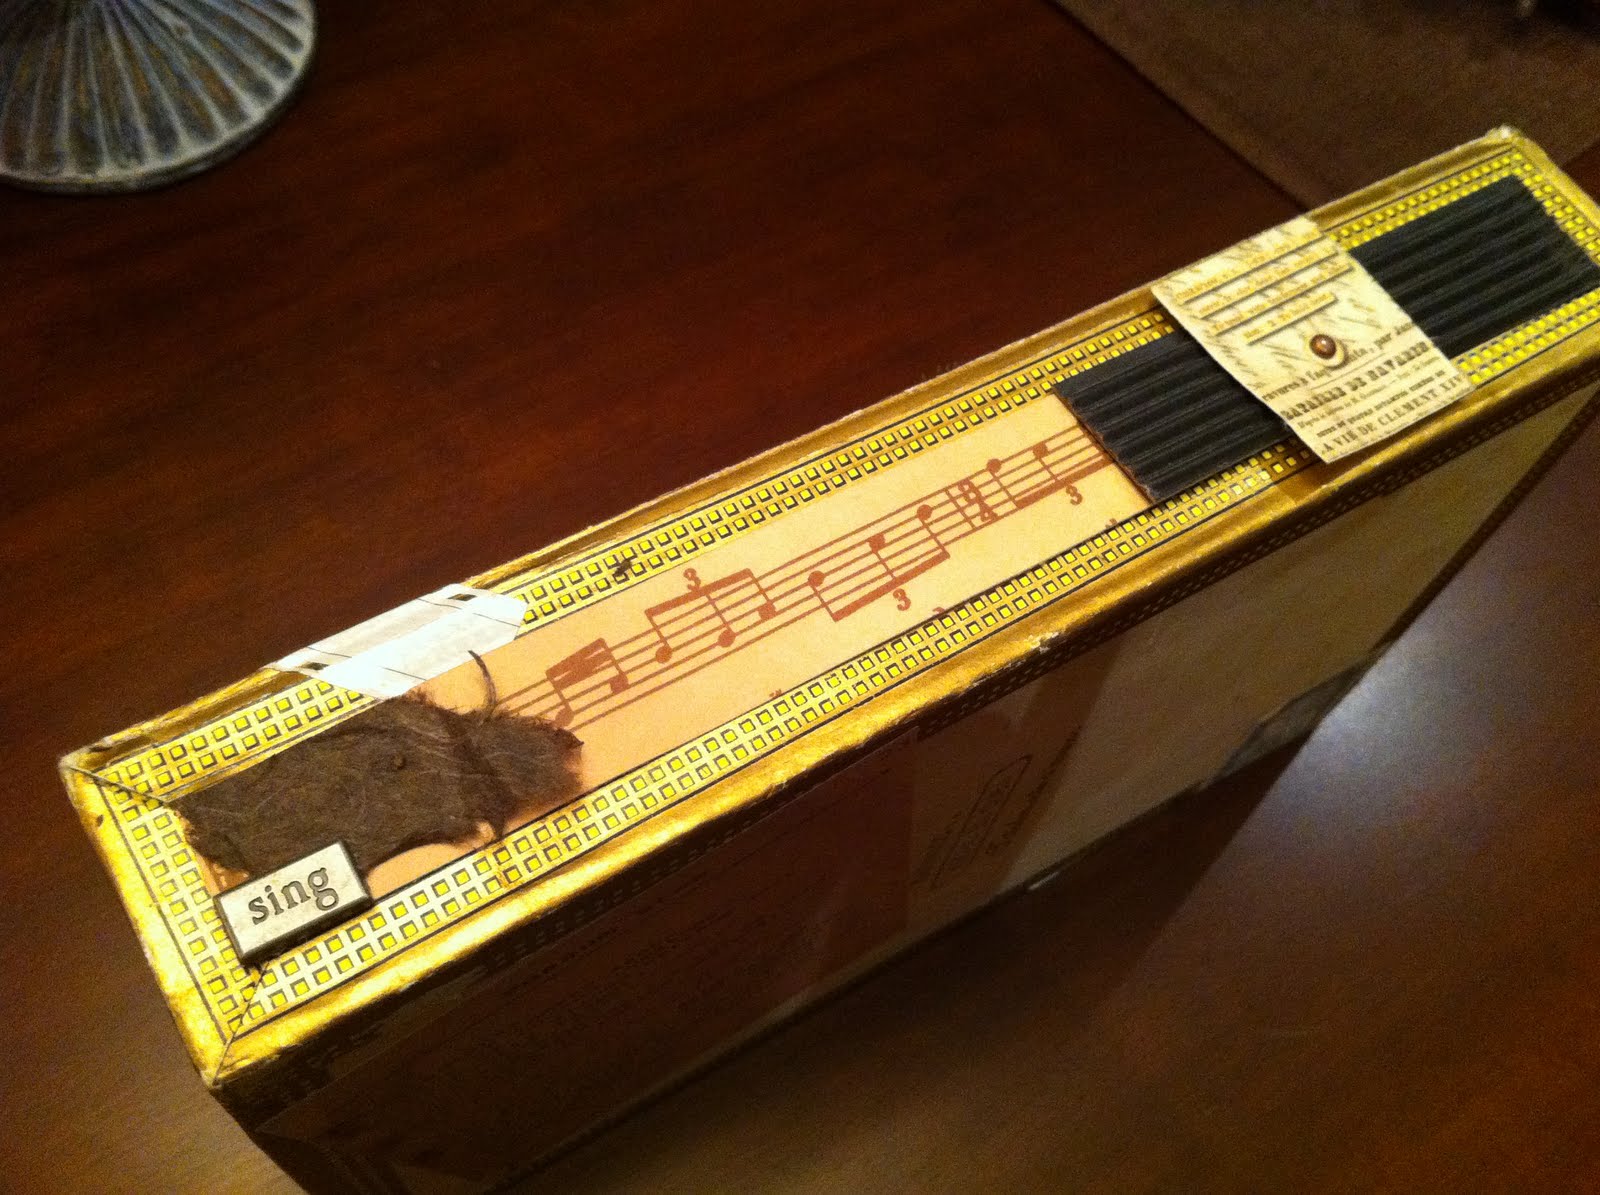
The long edges of the box were plain so I spruced them up with some music sheets, mulberry paper and a couple of sentiments I had around the scrap room.


The bottom of the box is a lovely wood. So, I only added another old recipe I found online for Possum Stew.


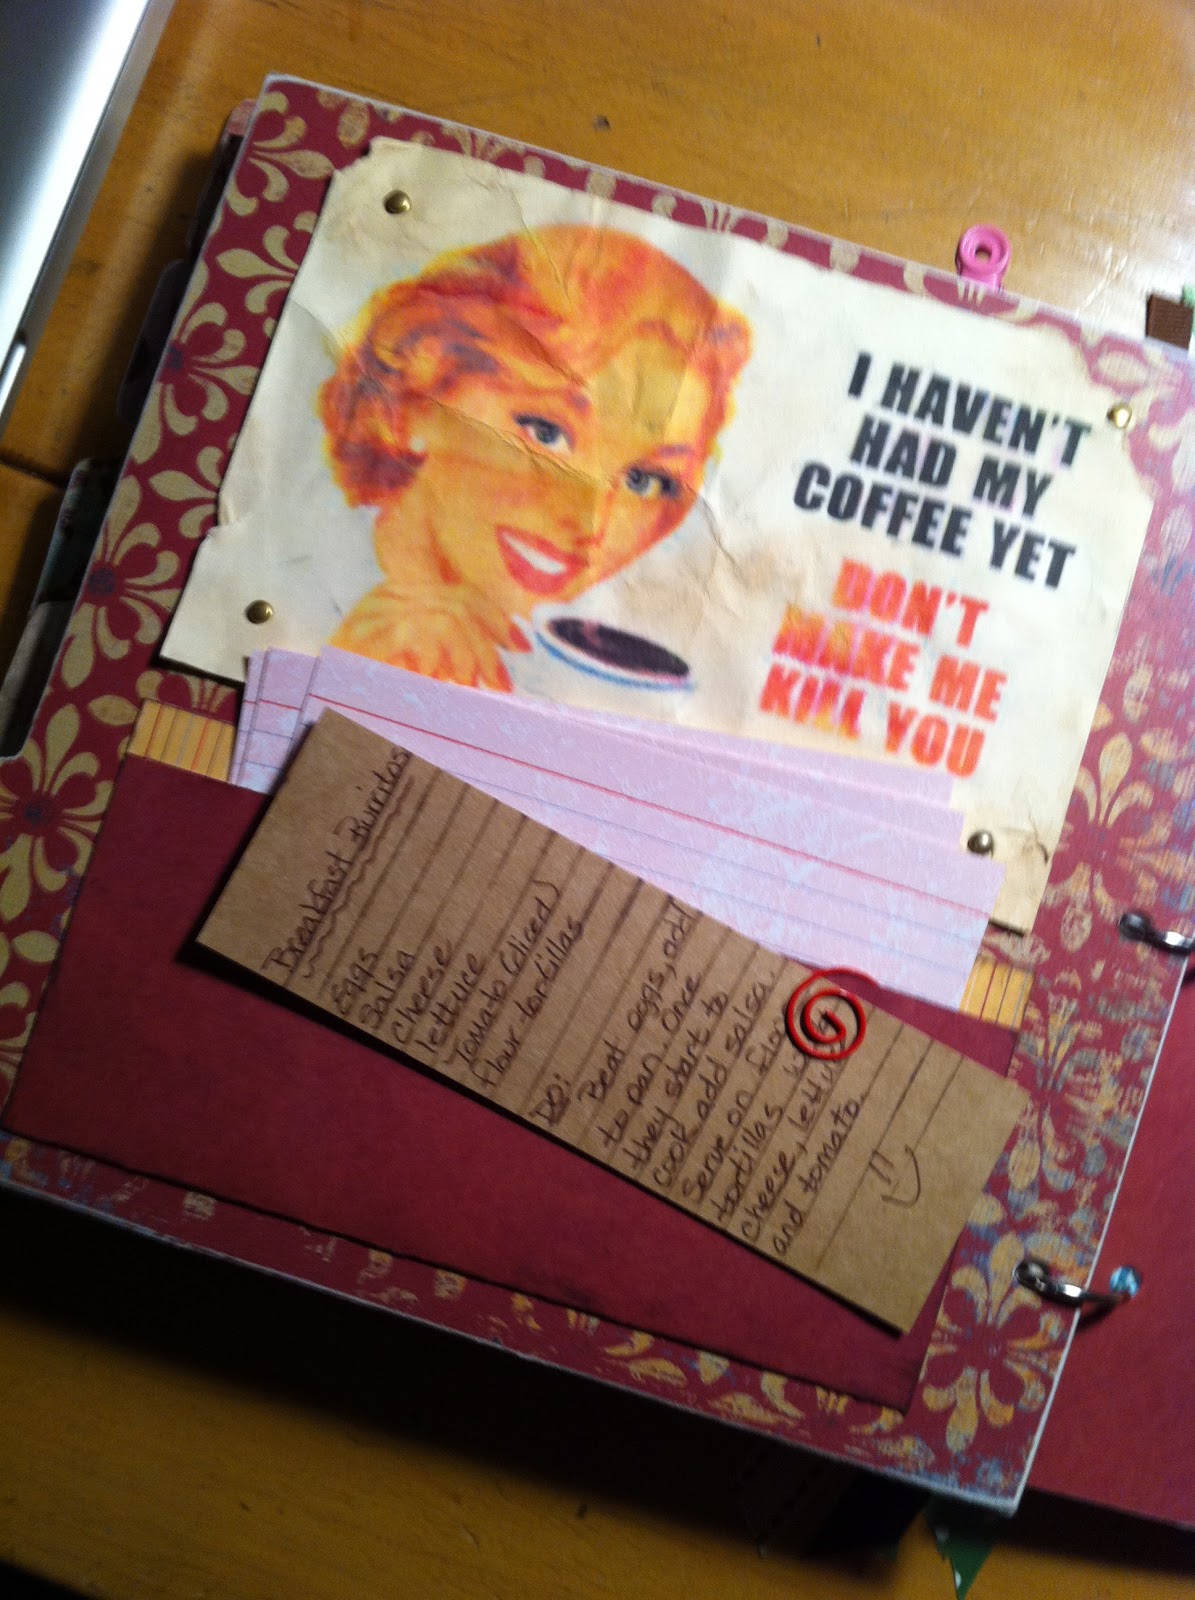
Here is the card... simple but effective.  Inside verse is on vellum and reads "Let us celebrate the occasion with wine and sweet words"- Plautus.

I made the envelope with more paper bag and cut a corrugated heart to make a seal.


So, next time you need to wrap a gift,  see what you have laying around!

This project is being added to : Inspire Me Fridays link up party!
                                                : Salvage it Saturday linky party!
                                                : Creative Cutting Room linky party!

Sunday, April 17, 2011

Free beez..

I had to make some pages with tabs. So, I quickly designed these and thought I'd share. Handy when you need them. There are a few other free SVGs on my download page, I'm trying to add more as I have the time or I create one for myself. Enjoy!


Six Tabbed Pages


All of my free SVG files at Cropacabana.com can be opened with Safari or Firefox browsers. Internet Explorer will not open them. To download any SVG, click on the download button. When it opens, right click and save (“save page as” in Mac) to your computer. If you have any trouble contact Patricia directly.


Download the SVG. Open in SCAL, resize to your needs and then ungroup to cut individual pages. If you need pages ungrouped by me, please contact me.

Thursday, February 24, 2011

Petal Envelope tutorial

I give my apologies in advance. I seriously need a new camera.
Mine has died a slow and pathetic death, tattered images marred with eerie bars of light where none exist in the real world.. I swear my last video had The Milky Way running through it, complete with stars.
I'm really not sure what, specifically, caused it to stop working but I'll assume it was "delicate". Yes, I've tossed it into bags while vacationing, dropped it and dragged it around the beach all summer.
So?
Sand, humidity and falling over never hurt me. What a wimp.
Anyhooo.. I digress. I have made a short tutorial video on my iPhone to see if it could stand up to the test. Bah! Ever try to mount an iPhone to a tripod? Finally, settling on standing it up in my used coffee cup that was sitting on a portable set of plastic drawers I got down to business (I know, I know.. it's delicate (a few more dirty cups and I'll be saying goodbye to my little friend.) Sadly, because of the coffee cup camera holder, I could not shoot sideways which would make a bigger picture. When your done making fun of me, send duct tape.
Honestly, thanks for hanging in there while I sort through the camera issue.
I'd like to share my simple yet effective petal envelope with you. The SVG can be found in the downloads page on my website and you can cut it on your Cricut using Sure Cuts A Lot or Make The Cut. In my Baby Boy album this was one of my favorite pages. So easy to make and decorate to your liking. If you don't want the fold outs with 5 pictures, just make it and add one photo mat inside. Easy peasy. If you do that you won't even need a string closure and can just close it flap over flap (see image below.)
I also ended up adding a second large brad as I wanted to bring the string back up to the top and the little brad couldn't take the load.
And now, the iPhone video tutorial...

Thursday, February 10, 2011

This weeks Feature: Cupcake card

Gosh, you ever get so busy you leave things to the last minute? Well, I did that very thing and had to have a card for a party one evening. This seems to be my mantra.. wait, panic, do! So, I came up with this Birthday idea for someone who loves to play Scrabble.

This weeks feature is a double slider cupcake card that is a pretty simple design, but adorable. Another testament to the Less is More theory. I got the double slider idea from Dawn Griffith of ‘Dawn’s Stamping Thoughts’, she has awesome ideas! Love her stuff.

The cupcake was cut using Cricut cartridge “From My Kitchen.” Of course I inked the edges to make it a little more retro. When you pull the bottom tab the card slides out top and bottom! I always say, the more interactive the better! Must have had something to do with the pop up books I loved as a child.

Hmm.. I wonder if I could make a pop up book?

www.cropacabana.com

Vintage Recipe Book

This is that surprise book I mentioned last time.
I have a friend, who like myself has trouble in the kitchen when it comes to cooking. Oh, I can bake, but don’t ask me for dinner.
In order to help her out, I asked good ‘ol Gordo (he’s my lovely, Italian, other half who actually can and does cook) to write up some of his recipes for her as he can throw anything together and it’s fabulous!
I.. on the other hand, can throw paper together. So, I made her this book to keep the recipes in. I left some blank cards so she can add more and I will try to get some more for her over time, even if I have to chase Gord around the kitchen with my laptop taking notes.

Sadly, the video I created is of very poor quality as my camera is dying.. I posted it at the bottom but there is a terrible faded bar of light across the top and it kept shutting off. Sigh, I guess I need a new camera. I’ll add some extra still pics below and more on the photo page of my site www.cropacabana.com 


Sunday, January 23, 2011

Mini Chipboard Album - Baby boy

A mini chipboard album for my Grandson, Kayden.

This album has been added to the following linky parties:
Make it Monday linky party
Inspire me Fridays linky party

Moving away from traditional baby colors, I’ve mixed in rusts, browns and blues to give it more boy than baby feel. Most of the paper was from My Minds Eye “Complete Boy Collection”. I added a lot of little details and interactive pages to keep it interesting. I always try to throw in a few shaped pages for visual interest as well. As always, I never think I’m finished and the books get too thick (is that even possible?
Multi Pocket Tag holder (right)
Free Petal Envelope SVG available on my site
I’ll soon be adding tutorials on all the items you see used here. Most of it is pretty straight forward, the multi pocket tag holder (above) was the most complicated and even that wasn't too hard using a standard envelope. Unfortunately, I did forget to photograph of the back side of the photo tags, which all had something on them. 

Next up: A secret surprise book for someone special and I have a few Facebook “Pay it forward” gifts to get busy with.

See the entire book on the video below or view all pages in photos at www.cropacabana.com